RSS
 

Archive for the ‘Technical’ Category

I Just Want to Submit a Frickin’ iPhone App to the App Store! (Part 3)

28 Jul

Way back in in “I Just Want to Create a Frickin’ iPhone App! (Part 1),” I walked you through the logistics of joining the developer program (no, you didn’t miss “Part 2,” I have not written it yet). Fast-forward a couple of months and it’s time to submit to the app store! For a company that has built a reputation on simplicity, Apple has concocted an arcane process and made it worse by not providing any complete nor accurate information to help with the application submission process.  Apple’s minimalistic approach is of no help… you often feel like your flying blind as you try to make your way through the process. I’ll try to give some heads-up and clarity if you, too, are going through this for the first time.

So, let’s hope I can remember all that I went through.

  1. Create specific App ID: iOS Provisioning Portal →App IDs →New App ID.  (Note: you cannot delete App IDs once they are created).
    1. Enter a name for this application. This is just for reference; it will not appear to a user.
    2. Select the “Bundle Seed ID”. Normally you will want to select the one that was assigned to you, in the drop down.
    3. Define the App ID Suffix.  This has to match the ID that is bound into the application, so you will probably want to copy the one assigned to the application you’ve been building, lest it be recognized as an entirely new application. This is not critical, but if you have beta testers and you change the App ID, the next update will not overwrite the older version of the app, they will have to delete the old one, explicitly.To find (or change) the current Bundle identifier in Xcode 4.x, select the Target of the project. The Summary tab shows the Bundle identifier in the “Identifier” field; or, in the “Info” tab, it shown as “Bundle identifier”. Of course, these settings come from the project’s .plist file, so you can access its “CFBundleIdentifier” (aka “Bundle identifier”) explicitly. The value in the app should be the reverse domain name, for example, “com.handthingsdown.htdmobile”; do not prefix the “Bundle Seed ID” to the bundle identifier in the app.
    4. This value should match the Bundle Identifier field when creating a new App ID. As noted in the “How To” tab, you can use wildcards for this value; however, a fully qualified ID is necessary to utilize the various services (e.g., Push Notification, Game Center, iCloud).
  2. Create an App Store provisioning file:  iOS Provisioning Portal →Provisioning →Distribution →New Profile.
    1. Be sure the “Distribution Method” is set to “App Store”.
    2. Select the App ID from the previous step to associate with your application.
    3. You wont have to — or be able to — select devices to include, as you would for ad hoc provisioning.
  3. Once the profile has been created, download and add it to your Xcode profiles.
  4. Create an archive build of your application, build for release and utilizing the App Store provisioning profile.
    1. If you haven’t already, you may want to duplicate the Release build-configuration to “Distribution App Store” (making sure that the target is not selected go to Xcode’s menu: Editor →Add Configuration →Duplicate “Release” Configuration.
    2. In the project’s target’s go to Build Settings →Code Signing →Code Signing Identity.  Below the build configuration you will use to build the Archive, set the “Any iOS SDK” setting to the provisioning profile you created for distribution to the App Store. (For the build configuration itself, I selected “Don’t Code Sign”; but I do not know if that matters).
    3. Modify build scheme’s Archive to use the build configuration you configured and build the Archive.
    4. From the Organizer’s Archive view, select and “Validate…” the binary. This performs (only) some tests of the module before uploading.
    5. We will jump away from Xcode for a moment….
  5. So you thought you were done signing up with programs with Apple? First an Apple ID, then the Developer Center, then an iOS Developer, and now iTunes Connect, itunesconnect.apple.com. Go to a web page and set up an account. This is where you will manage the applications that you submit to the App Store.
  6. Once your account is created, go to “Manage Your Apps” and select “Add New App”.
  7. Fill in the app name, SKU, and select a Bundle ID. Note that none of these settings can be changed once the app has been accepted by Apple.
  8. Click the “Ready to Upload Binary” button to start the process. The upload does not occur via the web page.
  9. Go back to Xcode. Since the Archive was just built, the Organizer window should be open with the Archive view shown. Be sure the correct Archive is selected (at the top of the list).
  10. Upload your application to Apple. There is the new, complicated way (which I used) and an old simpler way, that should still work—so I hear. So, back to Xcode…
    1. First, the old, simple way.  Ignore the messages on the iTunes Connect web page about the Application Loader. From Xcode’s Organizer window’s Archive’s view, click the “Submit…” button. That’s it!
    2. Now the difficult way:
      1. Click the “Share…” button. to build “iOS App Store Package”
      2. Select App Store certificate
      3. Open Application Loader and follow its steps to upload the .ipa file that was created in Xcode.
  11. Once the module has been submitted, there are additional automated checks that take place. So, wait an hour or so and check back at the iTunes Connect page. The status should change, if the module was accepted. If not, check your email to see what kind of errors may have occurred.
  12. If it passed the automated checks, you can now wait nervously for actual humans to vette the application. Expect this to take a full week.
Good Luck! Let me know what your experiences are.

Resources

Enhanced by Zemanta
 

Memory Management Part I: Objective-C Object Ownership

16 May

Proper memory management by an application is key to stability of an application. Doing it incorrectly can cause a myriad of bad things to happen! The side effects can include corrupting application data, crashing the application, locking up use of the computer or device, or even crashing the system or causing it to reboot.  Thus, memory management concerns are always in the back of the mind of every programmer (and, if they are unfortunate, the front of their mind), especially when they learn a new language. This article introduces programming issues related to memory management. In my next article I will get more technical with best memory management practices in programming iOS/CocoaTouch View Controllers.

In older, procedural programming languages that allow memory allocation (non-object based languages such as C or  Pascal), managing memory was pretty straight forward:

[sourcecode language=”c” light=”true”]
int appFunction(int size)
{
int *array = malloc(size * sizeof(int));
â‹®
free(array); // Done with the dynamically allocated memory
} // appFunction()
[/sourcecode]

Example: C-language memory allocation.

With object-oriented programming, application designers tend to structure their designs as a fluid interaction of objects. The syntax of object-oriented languages (such as C++ or Objective-C) helps programmers to avoid memory management mistakes easier than procedural languages, particularly in more complex application designs.

Since Objective-C was invented along with the APIs and frameworks used for environments like iOS and Mac OS X, Apple assumes its use with a class hierarchy and, for all practical purposes, a dependence on the NSObject base-class. This class determines a whole gamut of conventions that are nearly indistinguishable from the Objective-C language itself, so it is hardly worth discussing the use of Objective-C without NSObject.  While it looks complex, the important thing is that the allocation and deallocation is handled at well-known locations in the code that will be used for other purposes, the initializer and deinitializer.

[sourcecode language=”obj-c” light=”true”]
– (id)init:(int) size
{
self = [super init];
if (self)
_array = [[NSArray alloc] init];
return self;
} // -init
â‹®
– (void)dealloc
{
[_array release];
[super dealloc]; // Done with the dynamically allocated memory
} // -dealloc
[/sourcecode]

Example: Objective-C memory handling

Just as, with C, where you need to internalize when you should call malloc() and free(), with Objective-C  you should internalize “object ownership” and when to send retain and release. These retain/release messages (sending a message is analogous to a function or method call, in other languages) implement reference-counting—a way of keeping track of how many objects are referring to the object.

Internalize this rule: If you do alloc, retain, or copy on an object, you own it and it is your job to release it… otherwise it isn’t.

In Objective-C, objects allocate other objects for its use or other’s use. These allocations are memory allocations. Cocoa (used in Mac OS X) and CocoaTouch (the Cocoa variant used for iOS) programming frameworks assume a clear understanding of who owns an object. Any number of objects can retain ownership another, either explicitly or implicitly. If one object allocates another, then there is an implicit ownership of that object.

stringOwner implicitly owns the allocated object, so it must release it.

[sourcecode language=”obj-c” light=”true” highlight=”1,2,3″]
NSString *stringOwner = [[NSString alloc] init];
â‹®
[stringOwner release];
[/sourcecode]

tempString does not get ownership, but it can use it for the duration of the method.

[sourcecode language=”obj-c” light=”true” highlight=”1,2,3″]
NSString *tempString = [NSString string];
[/sourcecode]

stringOwner has claimed ownership via retain, so it must release it.

[sourcecode language=”obj-c” light=”true” highlight=”1,2,3″]
NSString *stringOnwer = [[NSString string] retain];
â‹®
[stringOwner release];
[/sourcecode]

If an object is passed as a parameter to another method, it is possible that the other method may claim ownership of the object. In this case, the sender (AKA “caller” in other languages) can release the object if it won’t need it, later.

[sourcecode language=”obj-c” light=”true” highlight=”1,2,3,4,5,6″]
NSString *stringOnwer = [[NSString string] retain];
â‹®
[existingArray addObject:stringOwner]; // array is also, now, an owner
â‹®
[stringOwner release]; // Not needed by this method (or class any longer)
[/sourcecode]

The problem is that, despite Apple’s simple set of rules (or, better yet, the Rules of Thumb), it is often not clear which of their APIs retain ownership of the objects passed in, even by reading the official documentation. I usually find that if I am at all unsure, I need to google it—which often leads to the most reliable advice coming from Stack Overflow.

Apple must know this because they provide their excellent (though not perfect) Instruments tool that works with their Xcode development environment to help ferret out memory bugs and leaks.

Next, I will write about memory usage as it relates to iOS CocoaTouch View Controllers (because that also isn’ve very apparent).

Resources — The Basics


Frameworks: Beyond the Nuts and Bolts

06 May

Without frameworks our “big ideas” would still be stuck in the pre-industrial age. —Bill Lee, Berlin, 2008

I have been on a long hunt for a PHP framework so I was going to write up an article about PHP frameworks, but then I thought I should back up a bit and talk about what a framework is and why you should use one.

Software driven computing has existed for over 60 years. In the early days computer programming was performed using long series of numbers to represent the electronic switches tell a computer what to do—computers still work this way. Fortunately no one has to program computers by speaking computer-ese numbers anymore. With that kind of tedious programming, the most advanced programs would be tic-tac-toe games.

But numbers are the nuts-and-bolts of a computer’s operation. Designing a sky-scraper while having to dwell on every nut and bolt of its construction might limit us to working in ten story buildings. It is vitally important in designing complex systems to be able to think at more abstract, level. Programming using numbers quickly led to “assembly language” as mnemonic way of specifying those numbers, then to “third-generation” programming languages (such as C, C++, Pascal, Fortran) which allow programs to be written without regard to the numbers that the computers can actually interpret. This frees software designers to think about problem-solving without being encumbered by the tediousness of the numerical “nuts-and-bolts” needed by the computers that run the programs.

Constructing a building does not occur in isolation; its context involves the skills and machinery of those involved as well as governmental and environmental infrastructure. Over the past 30+ years, the complexity of computing has given rise to very advanced operating systems that define the context in which a program runs. Add to that, the interactions between a program and other programs or data that exist across a network or even the internet and the complexity of issues add to the tediousness of dealing with nuts and bolts. Again, if a software designer has to dwell on the minutia of all these elements, modern complex, powerful software would never be completed.

A framework attempts to encapsulate the complexities of designing and implementing software. A good framework allows software design to occur more abstractly, unencumbered by the tediousness of the contextual details of  the environment. Said a different way, a good framework allows the software designers to focus on the application’s purpose rather than the complexities of implementation.

Software is constructed in layers or components. Encapsulation is one of my favorite concepts in software design and implementation. It embodies the idea that there are specifics at every level or component within the software system that need not be exposed outside that implementation for that level. There are two key side-effects of this: (1) it prevents parts of the program outside the component from messing with or depending on implementation details which leads to (2) each component’s implementation can be changed or improved without fear of adversely affecting use of the component in unexpected ways. This leads to more stable, maintainable products.

Good programmers embed encapsulation within their design and implementation. Many object-oriented programming languages attempt to formalize this concept so that it is easy to do this. Well designed frameworks do the same, “protecting” some parts of the program from complex or variable implementation details.

There are good frameworks and there are bad ones. In a later article, I will discuss some of the issues to consider in picking a framework.

What have been your experiences in using programming frameworks?


Experiment: Turning an iTouch + MiFi into a No Contract iPhone

11 Apr
Turning iPod to iPhone Apps

Out of sheer frustration from the lack of AT&T service on the iPhone 3GS in some parts of San Francisco and at home, I started looking at alternatives in service without signing up for another contract. In this quest, I stumbled upon Virgin Mobile and their MiFi card for only $149.99 which is the exact same MiFi card as sold on Verizon and Sprint for much more. I thought I would connect through Virgin Mobile MiFi (uses the Sprint network) when AT&T didn’t have service. This is a reposted from my personal blog.

This post is long overdue, if you googled iPod Touch and MiFi together, you would have come across a LifeHacker article which details how to use this combination as a solution. While having two devices is not ideal, I find it’s much better than when I was using my iphone which had NO SERVICE at home. At best I had intermittent service to send and receive occasional texts but not enough bandwidth to have a conversation without sitting in perfect stillness or contorting my body by a window to get the signal. Ironically, I pulled the SIM card out of my iphone and put it in a Motorola RAZR and the RAZR received phone calls. The calls weren’t perfect on the RAZR yet I had enough of a signal to hear a conversation. On the iphone people would cut in and out that I would miss half the conversation and was completely frustrated between that and the dropped calls.

Apps to Talk & Text on the iTouch
First, I’ve tried several voice over IP (VOIP) apps on the iphone and forwarded my google voice number to the VOIP apps. These apps usually make you select a new phone number without the option to port in an existing number. I use google voice (GV) for the business and forward it to a phone number with a signal or answer calls on the computer. A previous guest post on GenJuice details how to make free voice calls, video chats, and texting.

Here are the apps I’m using to give the iPod Touch cell phone functionality.

Textfree with Voice by Pinger

Textfree with Voice

I was using the beta version when Pinger introduced voice-functionality at TechCrunch Disrupt last year, it crashed a lot and I received the servers were not available dialogs. It has since improved, then added the ability to received free incoming calls, send picture messages from a textfree email address which is [your_username]@textfree.us, and facebook chat from within this app. Sometimes, calls take a bit longer to connect because GV will route the call to all of my available numbers. I haven’t tested how quickly calls come through if you dial the number directly. The caveat with this free app is if you don’t use the app for 30 days, you will lose the number you selected and I still occasionally get the Textfree servers are not available message.

Pros:

  • Free incoming calls
  • Send picture messages
  • Facebook chat within the app
  • Notifications popup on the screen when you get incoming texts
  • Calls sound pretty good when using home WiFi
Cons:
  • Takes awhile for incoming calls to activate even after you click answer when using the MiFi card to connect to the internet.
  • Calls on 3G are still somewhat hollow sounding for the recipient.
  • Can’t receive MMS or picture messages to your iTouch unless the sender sends the message to your Textfree email address.

Skype

Skype

I pay $2.99 a month for unlimited outgoing calls to the United States and Canada on Skype. I don’t need to call internationally which is why this plan works for me. I also signed up for the SkypeIn or an online phone number which was about $12 for three months before I learned Textfree had the free incoming calls. Dropping the online phone number since I can receive calls via my computer on Google Talk.

Pros:

  • You select the number that will show on the caller ID for your outgoing call. I like this because my GV number is what people see call their mobile or landline either from my iTouch or the desktop version of Skype.
  • Video calls on the go when in a good 3G area or ideally on WiFi.
Cons:
  • Voicemail – there is currently voicemail on Skype and I don’t know how to get rid of it. I prefer the GV voicemail since it transcribes my messages.
  • Calls when in a non-3G area don’t sound very good.
GV Connect

GV Connect by Andreas Amann

Of the Google Voice apps I’ve tested, I like GV Connect over the app released by Google. In composing a new SMS or text message, you can type in the name of the person you want directly in the TO field, tap out your text, then send. In the Google Voice app, unless you have the number memorized, you have to go to the address book to select the person first, then select text, before you can even tap out your message. It was too many steps, come on Google, really!??

Pros:

  • Sending a text uses my address book without having additional steps.
  • Select which phones to forward calls and texts to from within the app.
  • Select do not disturb directly from the app.
  • Regular updates to the app to fix bugs and add features.
  • Integrates with Talkatone if using that for VOIP.

Cons:

  • Not a VOIP app.
MiFi

MiFi

This app doesn’t add calling or texting capabilities, I had to add it because I use it to check battery life on my MiFi card and to see the signal strength. It supports MiFi from Virgin Mobile, Verizon, and Sprint.

Measures:

  • Connectivity bars (0 – 5 bars)
  • Battery level (0 – 4 bars)
  • Data received and sent (in/out)
  • IP address
While the experience with the iTouch and MiFi is not ideal, it was good enough for me to put my AT&T account on hold until announcements of the iPhone 5. I will detail that later along with the other apps I’ve tried and ultimately deleted from my ipod because they didn’t do what I wanted well enough.
Have you tried these apps on your ipod or ipad? If you have better suggestions for a VOIP app let me know in the comments, I would love to try them out!
 
1 Comment

Posted in Technical


I Just Want to Create a Frickin’ iPhone App! (Part 1)

15 Mar
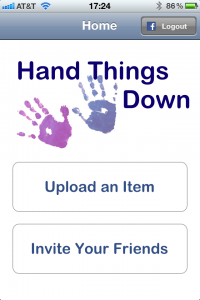
Hand Things Down’s first iPhone application

Hand Things Down’s first iPhone application

We had a big deadline, yesterday, to have an iPhone app running. For those of you who who’ve heard about the multitude of hurdles that you have to cross in order to get an iPhone app working, I will summarize my experience over the past couple of weeks. I am not even talking about submitting an app to the Apple App Store, only to get it running on a device.  If you read no further, know this: DO NOT WAIT until the last minute and think you can do this in an hour; there are logistics that involve faxing(!!) and people at Apple, so it will take days. Hopefully some hints, here will help to trim that down.

Here are the steps (from memory):

  1. Join the Apple Developer Connection (developer.apple.com).  This is free and it will give you access to bunch technical information and videos (but not all!). This step is quick and painless.
    1. Find your way through one of the Dev Center links or just go to developer.apple.com/programs/register.
    2. Be sure that the email address and name are what you want to use because they will verify subsequent information, later (in the certificate used to run your app on your actual device).
    3. You will need to verify the email address through the email they send you. This is automated, so it shouldn’t take long.
  2. Once you have registered, you can also download the iOS SDK so that you can develop an application and run it in its simulator. This, of course is the same SDK you’d use for iPod Touch and iPad development.
  3. You have to have Mac OS Snow Leopard (10.6.4) or later to install the SDK… expect an upgrade from 10.5 to take 2-3 hours, after the update patches that might be required, are also applied.

  4. To run your application on an iPod Touch, iPhone, or iPad, you need to join and pay for the “iOS Developer Program.” This process isn’t specific to iOS; you will be able to opt into one of Apple’s three developer programs, iOS, Mac, and Safari. The first two cost $99. and the latter is free.
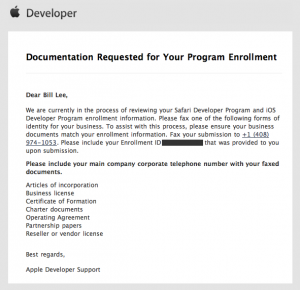
  5. I needed to register our company as the “developer” so that any applications are released under the company’s name, rather than my own. Apple wants to verify that it is a legitimate entity; so they sent an email asking me to fax proof of the company’s validity (Fax?!! Really, Apple?! Really?!!). They manually review the paperwork before anything else happens. By taking the time to read this blog-post, you can avoid the time and frustration I had to go through (they never processed my fax):
    Apple Dev Program company paperwork request

    Apple Dev Program company paperwork request

    Call Apple Developer Support at one of their phone numbers—for the US, call (408) 974-4897 or (800) 633-2152, Mon-Fri, 9:00AM-7:00PM CST. Tell them that you’d faxed your paperwork in 3 or 4-days ago. If you are nice, they will send you an email where you can attach your paperwork and email back!

    That little tid-bit might save you days of waiting. If you are an individual developer, then this might not apply.

  6. You will get another confirmation email, “Information Received Regarding Your Enrollment,” from them as soon as the support person does whatever they do. You’ve yet to pay, however. I had to wait for another 2-days to receive an “Apple Developer Program Enrollment Update” email. If you do not receive this email, you can try writing your support contact again or try the link that you will eventually get, to see if you can proceed: developer.apple.com/ios/enroll/purchaseProgram.action. It took me two days to get this email. I was then able to pay.
  7. The next day I received an invoice and the confirmation email “Thank You for Joining an Apple Developer Program,” and I was no longer beholden to the black-box procedures of Apple (as far as I know… see my next posting). Now I have access to the additional technical information and I am able to go through the logistics of deploying my app to my iPhone, for the first time.

Total time, for me: 11 days, most of it waiting on Apple!! Hopefully this post will allow you to cut a week off that time. Happy programming!

 
6 Comments

Posted in Technical